
第 6-3 章 Linux httpd 服务高级配置
本文主要针对 httpd 在 ARM64 架构下进行编译配置,然后搭建一套经久不衰的 LAMP 架构环境。
6.1、解决 httpd 编译依赖
本文以 httpd 2.4.51 版本为例。
apache 自己的站点提供了基金会下所有的(包括所有版本)资源,包括 httpd。
httpd 下载地址:https://dlcdn.apache.org/httpd/
httpd 同样使用 "./configure"、"make && make install" 的编译流程编译。但是它有一些依赖包需要提前装好。官方上指定的依赖环境有:apr、apr-util、pcre、pcre-devle,此外还需要 expat-devel 包。其中 pcre、pcre-devel 和 expat.devel 可以直接使用 yum 安装,apr 和 apr-util 需要编译安装。
apr 和 apr-util 下载地址:https://apr.apache.org/
[root@arm64v8 ~]# yum install pcre pcre-devel expat-devel编译 apr:
[root@arm64v8 ~]# tar -xf apr-1.7.0.tar.bz2
[root@arm64v8 ~]# cd apr-1.7.0/
[root@arm64v8 apr-1.7.0]# ./configure --prefix=/usr/local/apr
[root@arm64v8 apr-1.7.0]# make && make install-
问题1:
rm: cannot remove 'libtoolT': No such file or directory- 解决方法:
[root@arm64v8 apr-1.7.0]# vim configure
将 RM='$RM' 改成 RM='$RM -f'
编译 apr-util:
[root@arm64v8 ~]# tar xf apr-util-1.6.1.tar.bz2
[root@arm64v8 ~]# cd apr-util-1.6.1/
[root@arm64v8 apr-util-1.6.1]# ./configure --prefix=/usr/local/apr-util --with-apr=/usr/local/apr
[root@arm64v8 apr-util-1.6.1]# make && make install
然后是编译 httpd,httpd 编译对刚接触的人来说可能有些麻烦,因为编译选项太多,其中的一些 "潜规则" 也不太熟悉。所以下面详细地说明。
6.2、httpd 编译选项
httpd 的编译选项非常多。以下是截取 ./configure -h 中的一部分,使用 "......" 表示省略了一堆信息。
Configuration:
  -h, --help              display this help and exit
      --help=short        display options specific to this package
      --help=recursive    display the short help of all the included packages
  -V, --version           display version information and exit
  -q, --quiet, --silent   do not print `checking ...' messages
      --cache-file=FILE   cache test results in FILE [disabled]
  -C, --config-cache      alias for `--cache-file=config.cache'
  -n, --no-create         do not create output files
      --srcdir=DIR        find the sources in DIR [configure dir or `..']

Installation directories:
  --prefix=PREFIX         install architecture-independent files in PREFIX
                          [/usr/local/apache2]
  --exec-prefix=EPREFIX   install architecture-dependent files in EPREFIX
                          [PREFIX]

By default, `make install' will install all the files in
`/usr/local/apache2/bin', `/usr/local/apache2/lib' etc.  You can specify
an installation prefix other than `/usr/local/apache2' using `--prefix',
for instance `--prefix=$HOME'.

For better control, use the options below.

Fine tuning of the installation directories:
  --bindir=DIR            user executables [EPREFIX/bin]
  --sbindir=DIR           system admin executables [EPREFIX/sbin]
  --libexecdir=DIR        program executables [EPREFIX/libexec]
  --sysconfdir=DIR        read-only single-machine data [PREFIX/etc]
  --sharedstatedir=DIR    modifiable architecture-independent data [PREFIX/com]
  --localstatedir=DIR     modifiable single-machine data [PREFIX/var]
  --libdir=DIR            object code libraries [EPREFIX/lib]
........................................

System types:
  --build=BUILD     configure for building on BUILD [guessed]
  --host=HOST       cross-compile to build programs to run on HOST [BUILD]
  --target=TARGET   configure for building compilers for TARGET [HOST]

Optional Features:
  --disable-option-checking  ignore unrecognized --enable/--with options
  --disable-FEATURE       do not include FEATURE (same as --enable-FEATURE=no)
  --enable-FEATURE[=ARG]  include FEATURE [ARG=yes]
  --enable-layout=LAYOUT
  --enable-dtrace         Enable DTrace probes
  --enable-hook-probes    Enable APR hook probes
  --enable-exception-hook Enable fatal exception hook
  --enable-load-all-modules
                          Load all modules
  --enable-maintainer-mode
                          Turn on debugging and compile time warnings and load
                          all compiled modules
  --enable-debugger-mode  Turn on debugging and compile time warnings and turn
                          off optimization
  --enable-pie            Build httpd as a Position Independent Executable
  --enable-modules=MODULE-LIST
                          Space-separated list of modules to enable | "all" |
                          "most" | "few" | "none" | "reallyall"
  --enable-mods-shared=MODULE-LIST
                          Space-separated list of shared modules to enable |
                          "all" | "most" | "few" | "reallyall"
  --enable-mods-static=MODULE-LIST
                          Space-separated list of static modules to enable |
                          "all" | "most" | "few" | "reallyall"
.........................................

Optional Packages:
  --with-PACKAGE[=ARG]    use PACKAGE [ARG=yes]
  --without-PACKAGE       do not use PACKAGE (same as --with-PACKAGE=no)
  --with-included-apr     Use bundled copies of APR/APR-Util
  --with-apr=PATH         prefix for installed APR or the full path to
                             apr-config
  --with-apr-util=PATH    prefix for installed APU or the full path to
                             apu-config
  --with-pcre=PATH        Use external PCRE library
....................
以下是一个编译配置:
./configure --prefix=/usr/local/apache --sysconfdir=/etc/apache --enable-so --enable-ssl --enable-cgi --enable-rewrite --enable-modules=most --enable-mpms-shared=all --with-z --with-pcre --with-apr=/usr/local/apr --with-apr-util=/usr/local/apr-util --with-mpm=event但这个配置中有些项是多余的,以下是等价编译配置:
./configure --prefix=/usr/local/apache --sysconfdir=/etc/apache --enable-mpms-shared=all --with-z --with-pcre --with-apr=/usr/local/apr --with-apr-util=/usr/local/apr-util --with-mpm=event为什么说有些项多余呢,可以继续往下看。
6.3、模块动静态编译
httpd 是高度模块化的程序,各个功能通过加载各个模块来实现。但前提是将功能对应的模块先编译好,以供 httpd 加载。
httpd 对模块有两种编译方式:静态编译和动态编译。
- 静态编译:将模块直接编译进 httpd 的核心中。静态编译的所有模块都会随着 httpd 的启动而启动。
- 动态编译:将模块编译好,但不编译到 httpd 的核心中。要启动动态编译的模块,需要在 httpd 的配置文件中使用 LoadModule 指令加载。
httpd 的一个优点是可以实现动态模块的热插拔。因为 httpd 是独立于终端的守护进程,可以通过发送 HUP 信号给 httpd 让其重读配置文件。
而是否加载动态编译模块正是由 httpd 配置文件中的 LoadModule 指令决定的。
当想要加载某个模块 A 时(即模块热插),使用 LoadModule 指定 A 模块的链接地址,再发送 HUP 信号重读配置文件即可。而想要停止某个模块 A 时(即模块热拔),只需将对应模块的 LoadModule 指令行给注释,再重读配置文件即可。
甚至,可以随时动态编译某个外部模块到 httpd 中,然后再热插。因为何时编译需要动态加载的模块对 httpd 来说是无关紧要的,它只需 LoadModule 和重读配置文件两个过程对模块进行控制。
在编译选项中,有几种类型的选项:
--disable-FEATURE:              禁用某特性,等价于--enable-FEATURE=no
--enable-FEATURE[=ARG]:         启用某特性,默认参数值为YES
--enable-Module_Name=shared:    指定的模块Module_Name以动态编译方式安装
--enable-Module_Name=static:    指定的模块Module_Name以静态编译方式安装
对于 ./configure --help 中给定的选项,如果该选项是 --disable 的,那么表示该选项默认是启用的,需要显式使用 --disable 选项禁用;如果该选项是 --enable 的,那么表示该选项默认是禁用的,需要使用 --enable 选项来启用。例如:
--disable-authz-user    :表示authz-user特性默认启用,编译时无需指定该项。如果要禁用,编译时需显式指定--disable-authz-user
--enable-echo           :表示echo特性默认是禁用的,如果要启用,则编译时需显式指定--enable-echo
模块名的书写是有规则的,一般模块的全称类似于 "mod_BASENAME.so" 格式,例如 "mod_charset_lite.so",但在编译选项中指定模块时,只需指定 BASENAME,且如果 basename 中包含下划线时,需要转换为短横线。例如 "--enable-echo" 表示编译的模块是 "mod_echo.so"。
此外,还支持 3 种列表方式的动静态编译选项:列表项之间使用空格分隔,但要使用单引号包围。
--enable-modules='Module_Name1 Moduel_Name2'
--enable-mods-shared='Module_Name1 Module_Name2'
--enable-mods-statics='Module_Name1 Module_Name2'
列表部分还可以使用关键字 "all/few/most/reallyall"。分别表示编译所有、少量、大多数、真正的所有模块。
"--enable-modules" 基本等价于 "--enable-mods-shared",都是动态编译给定列表中的模块,但 "--enable-modules" 可以额外使用一个关键字 "none",表示不编译所有模块。
6.4、动静态编译的优先级规则
httpd 动静态模块编译有一套规则,各种动静态编译选项之间有优先级的存在。例如,某个非核心模块既指定了动态编译,同时又指定了静态编译,那到底是静态还是动态编译?
可以参照以下优先级规则:
-
不指定任何模块编译选项时,默认的选项为 "--enable-mods-shared",而该选项的默认值又是 most,所以等价于 "--enable-mods-shared=most"。
-
显式指定要动态或静态编译的优先级最高。有以下几种方式显式指定:
--enable-Module_Name=shared
--enable-Module_Name=static
--enable-mods-shared='Module_Name1 Module_Name2'
--enable-mods-statics='Module_Name1 Module_Name2'
--enable-modules='Module_Name1 Moduel_Name2'
如果某个模块既显式指定了动态,又显式指定了静态编译,则静态编译优先级更高。例如:
--enable-echo=shared
--enable-echo=static
那么,mod_echo 模块将被静态编译。
-
指定了关键字(all/most/few/reallyall)的 "--enable-mods-static" 选项,优先级高于指定或未指定关键字的 "--enable-mods-shared" 和 "--enable-modules" 选项,即静态关键字规则强于动态关键字规则。
例如,下面两个编译配置中,都是 "--enable-mods-static=few" 生效。第二个编译配置语句中将忽略 "--enable-mods-shared=all"。
./configure --prefix=/tmp/apache --enable-mods-static=few
./configure --prefix=/tmp/apache --enable-mods-static=few --enable-mods-shared=all
对于下面的例子,authn-file 和 echo 这两个模块既指定了动态编译又指定了静态编译,静态优先级高于动态,所以这两个模块被静态编译。由于没有使用关键字,所以会使用默认的 "--enable-mods-shared=most" 配置。即动态编译大部分,但指定的这两个模块被静态编译。
./configure --prefix=/tmp/apache \
--enable-mods-static='authn-file echo' --enable-mods-shared='authn-file echo'
而下面这个例子由于额外指定了使用 "--enable-mods-static=few" 选项,其优先级高于默认的 "--enable-mods-shared=most",所以结果是静态编译 few,且显式指定的两个模块也被静态编译。
./configure --prefix=/tmp/apache \ --enable-mods-static='authn-file echo' \ --enable-mods-shared='authn-file echo' \ --enable-mods-static=few -
使用了关键字的 "--enable-mods-static"、"--enable-mods-shared " 和 "--enable-modules" 的选项,隐含了 "没有指定何种编译方式的模块" 的默认编译方式。
例如下面的编译配置,"--enable-mods-static" 指定了关键字 few,它将优先于默认的配置规则 "--enable-mods-shared=most",所以没有指定编译方式的模块 "data" 将以静态的方式编译。
./configure --prefix=/tmp/apache --enable-mods-static=few --enable-data下面的配置如何编译的?由于默认的是 "--enable-mods-shared=most" 编译方式,所以模块 "data" 将以动态的方式编译。
./configure --prefix=/tmp/apache --enable-data再看下面的例子,配置中出现了 "--enable-mods-static=few" 和 "--enable-mods-shared"(未给定值时也是默认为 most),static 的优先级高于 shared,所以没有指定编译方式的模块 "data" 使用静态编译方式编译,而显式指定了编译方式的模块 "echo" 其优先级最强,所以动态编译 "echo"。
./configure --prefix=/tmp/apache \
--enable-mods-static=few --enable-mods-shared --enable-data --enable-echo=shared
6.5、MPM 的安装
编译 mpm 模块(prefork/worker/event)和其他模块差不多,唯一的区别是必须至少编译一个 mpm 模块,且必须有且仅有一个被 httpd 加载。
编译安装时默认的 mpm 是 event 模式(和发行版有关)。但可以通过 "--with-mpm=MPM_NAME" 来指定被加载的 mpm 模块。以下是几个相关编译选项:
--with-mpm=MPM_Name:            用于指定默认的mpm模块,它所指定的模块会被静态编译,并在httpd启动时加载。
--enable-mpms-shared=MPM-LIST:  指定动态编译安装的MPM列表,动态编译的MPM必须使用LoadModule指令加载才能使用。
如果定 "--with-mpm" 选项指定了某个 mpm,则默认该模块被静态编译,但如果同时使用 "--enable-mpms-shared" 指定了该 mpm,则该 mpm 模块被动态编译。
如果某个 mpm 模块被静态编译,在 httpd 启动时会加载它,如果想要切换到其他 mpm 模块,只有一种方法:重新编译 httpd。
而动态编译 mpm 模块时,则可以通过 LoadModule 来切换到其他 mpm 模块。由于编译时自带默认 mpm 模块,还可以使用 "--with-mpm" 指定默认 mpm 模块,所以动态编译 mpm 模块无疑比静态编译要好。
"--enable-mpms-shared" 可以指定动态编译的 mpm 列表,使用空格分隔,但需要使用单引号包围。还可以使用关键字 "all" 表示动态编译所有 mpm 模块。 例如:
--enable-mpms-shared='prefork worker'
--enable-mpms-shared=all
6.6、关于 "--enable-so"
一个模块被动态编译,在需要加载的时候使用 LoadModule 指令指定该模块,并重读配置文件即可。但 httpd 为什么能加载该动态模块?这就是 mod_so 的能力。实际上,LoadModule 和 LoadFile 指令就是该模块提供的。
该选项使得 httpd 有加载某动态模块的能力(DSO,Dynamic Shared Object),也因此它只能使用静态编译方式随 httpd 启动被加载。只要不显式指定 "--enable-so=shared" 或者将其加入显式编译列表,它都会默认以静态方式编译。实际上,只要显式指定了动态方式编译该选项,编译时会报错。
6.7、开始编译 httpd
至此,就可以开始编译 httpd 了。过程如下:
[root@arm64v8 ~]# tar xf httpd-2.4.51.tar.bz2
[root@arm64v8 ~]# cd httpd-2.4.51/
[root@arm64v8 httpd-2.4.51]# ./configure --prefix=/usr/local/apache --sysconfdir=/etc/apache --with-z --with-pcre --with-apr=/usr/local/apr --with-apr-util=/usr/local/apr-util --with-mpm=event --enable-mpms-shared=all
[root@arm64v8 httpd-2.4.51]# make && make install
其中安装路径为 /usr/local/apache,配置文件路径为 /etc/apache。
[root@arm64v8 ~]# ls /usr/local/apache/
bin  build  cgi-bin  error  htdocs  icons  include  logs  man  manual  modules
[root@arm64v8 ~]#- bin 目录为二进制程序存放位置,如启动脚本apachectl、httpd、htpasswd、ab(压力测试工具)等;
- htdocs 目录存放网页文件,默认里面有 index.html;logs 目录存放了日志文件,除了日志文件,默认还有 httpd 运行的 pid 文件 httpd.pid,这个建议修改到 /var/run 目录下(方便判断);modules 存放了编译后的模块;
- man 目录为帮助文档路径。
使用 httpd 的启动脚本 bin/apahcectl 启动 httpd,然后测试其是否正常。
[root@arm64v8 ~]# cd /usr/local/apache/
[root@arm64v8 apache]# bin/apachectl start
[root@arm64v8 apache]# netstat -tnlp | grep httpd
tcp6       0      0 :::80                   :::*                    LISTEN      3996/httpd
[root@arm64v8 apache]#
在浏览器中输入 IP 地址即可访问。
6.8、编译后的规范化操作
-
设置 man 路径。
echo "MANPATH /usr/local/apache/man" >>/etc/man.config -
设置 PATH 环境变量。
echo 'PATH=/usr/local/apache/bin:$PATH' >/etc/profile.d/apache.sh source /etc/profile.d/apache.sh -
输出头文件。
ln -s /usr/include /usr/local/apache/include -
提供服务启动脚本。
提供不提供没多大所谓,因为 apachectl 或 httpd 命令自身可以管理进程的启停,但自身管理启停时不提供 lock 文件。
如果要提供的话,从 yum 安装的 httpd 提供的 /usr/lib/systemd/system/httpd.service(systemd) 或 /etc/init.d/httpd(sysV) 拷贝后稍作修改就可以了。
以下是根据我当前的编译环境提供的 httpd sysV 服务管理脚本 /etc/rc.d/init.d/httpd。
#!/bin/bash
#
# httpd        Startup script for the Apache HTTP Server
#
# chkconfig: - 85 15
# description: The Apache HTTP Server is an efficient and extensible  \
#           server implementing the current HTTP standards.
#
######################################################################
#  若httpd配置文件中指定了PidFile,则修改此脚本中的pidfile变量            #
######################################################################

. /etc/rc.d/init.d/functions

if [ -f /etc/sysconfig/httpd ]; then
        . /etc/sysconfig/httpd
fi

# Start httpd in the C locale by default.
HTTPD_LANG=${HTTPD_LANG-"C"}

# This will prevent initlog from swallowing up a pass-phrase prompt if
# mod_ssl needs a pass-phrase from the user.
INITLOG_ARGS=""

# Set HTTPD=/usr/sbin/httpd.worker in /etc/sysconfig/httpd to use a server
# with the thread-based "worker" MPM; BE WARNED that some modules may not
# work correctly with a thread-based MPM; notably PHP will refuse to start.

# Path to the apachectl script, server binary, and short-form for messages.
apachectl=/usr/local/apache/bin/apachectl
httpd=/usr/local/apache/bin/apachectl
prog=httpd
pidfile=/usr/local/apache/logs/httpd.pid
lockfile=/var/lock/subsys/httpd
RETVAL=0
STOP_TIMEOUT=${STOP_TIMEOUT-10}
config=/etc/apache/httpd.conf

# The semantics of these two functions differ from the way apachectl does
# things -- attempting to start while running is a failure, and shutdown
# when not running is also a failure.  So we just do it the way init scripts
# are expected to behave here.
start() {
        echo -n $"Starting $prog: "
        LANG=$HTTPD_LANG daemon --pidfile=${pidfile} $httpd -f $config $OPTIONS
        RETVAL=$?
        echo
        [ $RETVAL = 0 ] && touch ${lockfile}
        return $RETVAL
}

# When stopping httpd, a delay (of default 10 second) is required
# before SIGKILLing the httpd parent; this gives enough time for the
# httpd parent to SIGKILL any errant children.
stop() {
    status -p ${pidfile} $httpd > /dev/null
    if [[ $? = 0 ]]; then
        echo -n $"Stopping $prog: "
        killproc -p ${pidfile} -d ${STOP_TIMEOUT} $httpd
    else
        echo -n $"Stopping $prog: "
        success
    fi
    RETVAL=$?
    echo
    [ $RETVAL = 0 ] && rm -f ${lockfile} ${pidfile}
}

reload() {
    echo -n $"Reloading $prog: "
    if ! LANG=$HTTPD_LANG $httpd $OPTIONS -t >&/dev/null; then
        RETVAL=6
        echo $"not reloading due to configuration syntax error"
        failure $"not reloading $httpd due to configuration syntax error"
    else
        # Force LSB behaviour from killproc
        LSB=1 killproc -p ${pidfile} $httpd -HUP
        RETVAL=$?
        if [ $RETVAL -eq 7 ]; then
            failure $"httpd shutdown"
        fi
    fi
    echo
}

# See how we were called.
case "$1" in
  start)
    start
    ;;
  stop)
    stop
    ;;
  status)
        status -p ${pidfile} $httpd
    RETVAL=$?
    ;;
  restart)
    stop
    start
    ;;
  condrestart|try-restart)
    if status -p ${pidfile} $httpd >&/dev/null; then
        stop
        start
    fi
    ;;
  force-reload|reload)
        reload
    ;;
  graceful|help|configtest|fullstatus)
    $apachectl $@
    RETVAL=$?
    ;;
  *)
    echo $"Usage: $prog {start|stop|restart|condrestart|try-restart|force-reload|reload|status|fullstatus|graceful|help|configtest}"
    RETVAL=2
esac

exit $RETVAL
6.9、搭建 LAMP 环境
本文给出搭建 LAMP 的步骤,其中 php 使用的是 php-fpm 管理方式,php 和 MySQL(MariaDB) 交互使用的是 mysqlnd 方式(另一种是 libmysql)。最后给出一个 php+mysql 的论坛程序 discuz 的布置过程。
6.9.1、编译 httpd
前文针对 httpd 编译做了详细地描述,这里不再赘述,下面只给出关键步骤。
-
解决 httpd 编译依赖
[root@aarch64 ~]# yum install pcre pcre-devel expat-devel [root@aarch64 ~]# tar xf apr-1.7.0.tar.bz2 [root@aarch64 ~]# cd apr-1.7.0/ [root@aarch64 apr-1.7.0]# ./configure --prefix=/usr/local/apr [root@aarch64 apr-1.7.0]# make && make install [root@aarch64 ~]# tar xf apr-util-1.6.1.tar.bz2 [root@aarch64 ~]# cd apr-util-1.6.1/ [root@aarch64 apr-util-1.6.1]# ./configure --prefix=/usr/local/apr-util --with-apr=/usr/local/apr [root@aarch64 apr-util-1.6.1]# make && make install -
编译 httpd
[root@aarch64 ~]# tar xf httpd-2.4.47.tar.gz [root@aarch64 ~]# cd httpd-2.4.47/ [root@aarch64 httpd-2.4.47]# ./configure --prefix=/usr/local/apache --sysconfdir=/etc/apache --with-z --with-pcre --with-apr=/usr/local/apr --with-apr-util=/usr/local/apr-util --with-mpm=event --enable-mpms-shared=all [root@aarch64 httpd-2.4.47]# make && make install -
编译后的规范化操作
[root@aarch64 ~]# echo "MANPATH /usr/local/apache/man" >>/etc/man.config [root@aarch64 ~]# echo 'PATH=/usr/local/apache/bin:$PATH' >/etc/profile.d/apache.sh [root@aarch64 ~]# source /etc/profile.d/apache.sh [root@aarch64 ~]# ln -sv /usr/include /usr/local/apache/include ‘/usr/local/apache/include/include’ -> ‘/usr/include’ [root@aarch64 ~]# -
提供 httpd 服务脚本,编辑 /etc/rc.d/init.d/httpd 输入如下脚本
#!/bin/bash # # httpd Startup script for the Apache HTTP Server # # chkconfig: - 85 15 # description: The Apache HTTP Server is an efficient and extensible \ # server implementing the current HTTP standards. # ###################################################################### # 若httpd配置文件中指定了PidFile,则修改此脚本中的pidfile变量 # ###################################################################### . /etc/rc.d/init.d/functions if [ -f /etc/sysconfig/httpd ]; then . /etc/sysconfig/httpd fi # Start httpd in the C locale by default. HTTPD_LANG=${HTTPD_LANG-"C"} # This will prevent initlog from swallowing up a pass-phrase prompt if # mod_ssl needs a pass-phrase from the user. INITLOG_ARGS="" # Set HTTPD=/usr/sbin/httpd.worker in /etc/sysconfig/httpd to use a server # with the thread-based "worker" MPM; BE WARNED that some modules may not # work correctly with a thread-based MPM; notably PHP will refuse to start. # Path to the apachectl script, server binary, and short-form for messages. apachectl=/usr/local/apache/bin/apachectl httpd=/usr/local/apache/bin/apachectl prog=httpd pidfile=/usr/local/apache/logs/httpd.pid lockfile=/var/lock/subsys/httpd RETVAL=0 STOP_TIMEOUT=${STOP_TIMEOUT-10} config=/etc/apache/httpd.conf # The semantics of these two functions differ from the way apachectl does # things -- attempting to start while running is a failure, and shutdown # when not running is also a failure. So we just do it the way init scripts # are expected to behave here. start() { echo -n $"Starting $prog: " LANG=$HTTPD_LANG daemon --pidfile=${pidfile} $httpd -f $config $OPTIONS RETVAL=$? echo [ $RETVAL = 0 ] && touch ${lockfile} return $RETVAL } # When stopping httpd, a delay (of default 10 second) is required # before SIGKILLing the httpd parent; this gives enough time for the # httpd parent to SIGKILL any errant children. stop() { status -p ${pidfile} $httpd > /dev/null if [[ $? = 0 ]]; then echo -n $"Stopping $prog: " killproc -p ${pidfile} -d ${STOP_TIMEOUT} $httpd else echo -n $"Stopping $prog: " success fi RETVAL=$? echo [ $RETVAL = 0 ] && rm -f ${lockfile} ${pidfile} } reload() { echo -n $"Reloading $prog: " if ! LANG=$HTTPD_LANG $httpd $OPTIONS -t >&/dev/null; then RETVAL=6 echo $"not reloading due to configuration syntax error" failure $"not reloading $httpd due to configuration syntax error" else # Force LSB behaviour from killproc LSB=1 killproc -p ${pidfile} $httpd -HUP RETVAL=$? if [ $RETVAL -eq 7 ]; then failure $"httpd shutdown" fi fi echo } # See how we were called. case "$1" in start) start ;; stop) stop ;; status) status -p ${pidfile} $httpd RETVAL=$? ;; restart) stop start ;; condrestart|try-restart) if status -p ${pidfile} $httpd >&/dev/null; then stop start fi ;; force-reload|reload) reload ;; graceful|help|configtest|fullstatus) $apachectl $@ RETVAL=$? ;; *) echo $"Usage: $prog {start|stop|restart|condrestart|try-restart|force-reload|reload|status|fullstatus|graceful|help|configtest}" RETVAL=2 esac exit $RETVAL -
启动 httpd 服务
[root@aarch64 ~]# chmod +x /etc/rc.d/init.d/httpd
[root@aarch64 ~]# service httpd start
Reloading systemd:                                         [  OK  ]
Starting httpd (via systemctl):                            [  OK  ]
[root@aarch64 ~]# lsof -i :80
COMMAND  PID   USER   FD   TYPE DEVICE SIZE/OFF NODE NAME
httpd   1684   root    4u  IPv6  24292      0t0  TCP *:http (LISTEN)
httpd   1688 daemon    4u  IPv6  24292      0t0  TCP *:http (LISTEN)
httpd   1689 daemon    4u  IPv6  24292      0t0  TCP *:http (LISTEN)
httpd   1690 daemon    4u  IPv6  24292      0t0  TCP *:http (LISTEN)
[root@aarch64 ~]#
6.9.2、编译 php
三种工作模式:CGI、作为模块加入到 apache、fastcgi。最简单的是以模块方式加入到 apache,此处演示的是 php-fpm 管理 php-cgi 方式。请参见 CGI 原理。
fastcgi 模式的 php-cgi,由 php-fpm 提供服务管理,它会根据配置文件启动一定数量的 cgi 进程,其默认监听的端口为 9000,该服务正常工作需要配置文件。也就是说 fastcgi 模式的 php 有两个配置文件,一个是 php 的配置文件,一个是 php-fpm 的配置文件。
虽然此处演示的是 php-fpm 管理方式,但有必要说明下,在 Linux 中如果模块化安装 php,不推荐在使用 Apache 2.x 中使用线程化 MPM(worker 和 event),而是使用 prefork 模式的 mpm,因为 Linux 系统的线程设计并不那么完美。
- 所以,如果 php 和 apache 在同一台主机上(cgi 或者模块化方式安装 php 的时候),建议 httpd 使用 prefork 模型,而不在同一台主机中,建议将 php 设计为 fastcgi 的工作模式。
- 而在 windows 平台中则无需考虑这些问题,因为 windows 系统是真正意义上的多线程系统。
下载相关文件地址:
- php 下载地址:http://php.net/downloads
- php 手册地址:http://php.net/manual/zh/
- 手册下载地址:http://php.net/download-docs.php
6.9.2.1、php 编译选项说明
编译安装 php 有非常多的选项,比 httpd 还多。可以在解压 php 后的目录下使用 ./configure --help 查看。以下是部分选项,其中给出 "--enable-XXXX" 的选项表示默认是 disable 的,若要开启,需要在此处手动 enable,如果给出的是 "--disable-XXXX" 表示默认是 enable 的。
--prefix=PREFIX
【SAPI modules:】
--with-apxs2=FILE       Build shared Apache 2.0 Handler module. FILE is the optional
                          pathname to the Apache apxs tool apxs
--enable-fpm            Enable building of the fpm SAPI executable

【General settings:】
--with-config-file-path=PATH      Set the path in which to look for php.ini [PREFIX/lib]
--with-config-file-scan-dir=PATH  Set the path where to scan for configuration files

【Extensions:】
      #######################################################
      # --with-EXTENSION=shared[,PATH]                      #
      # NOTE: Not all extensions can be build as 'shared'.  #
      # Example: --with-foobar=shared,/usr/local/foobar/    #
      #######################################################
--with-openssl=DIR      Include OpenSSL support (requires OpenSSL >= 0.9.6)
--enable-mbstring       Enable multibyte string support
--with-zlib=DIR         Include ZLIB support
--with-bz2=DIR          Include BZip2 support
--with-mhash=DIR        Include mhash support
--with-mcrypt=DIR       Include mcrypt support
--with-freetype-dir=DIR  GD: Set the path to FreeType 2 install prefix
--with-jpeg-dir=DIR     GD: Set the path to libjpeg install prefix
--with-png-dir=DIR      GD: Set the path to libpng install prefix
--with-libxml-dir=DIR   SimpleXML: libxml2 install prefix
--enable-sockets        Enable sockets support
--disable-xml           Disable XML support (不写时默认--enable-xml)

【连接数据库:】
--with-mysql=DIR        Include MySQL support.  DIR is the MySQL base
                          directory, if no DIR is passed or the value is
                          mysqlnd the MySQL native driver will be used
--with-mysqli=FILE      Include MySQLi support.  FILE is the path
                          to mysql_config.  If no value or mysqlnd is passed
                          as FILE, the MySQL native driver will be used
--with-pdo-mysql=DIR    PDO: MySQL support. DIR is the MySQL base directory
                          If no value or mysqlnd is passed as DIR, the
                          MySQL native driver will be used
--enable-mysqlnd        Enable mysqlnd explicitly, will be done implicitly
                          when required by other extensions
【Zend:】
--enable-maintainer-zts    Enable thread safety - for code maintainers only!!
部分选项说明:
-
在【zend】扩展部分的选项 "--enable-maintainer-zts" 是为了让 php 支持多线程 MPM 的,即 php 以模块化方式或 cgi 模式安装时且 httpd 配置为 worker 或 event 时需要启用该项。而如果 php 以 fastcgi 模式安装时,由于 php 有独立的服务和进程,所以该项是多余的。
-
"--with-apxs2" 是让 php 以模块化的方式安装到其他程序中,"--enable-fpm" 是让 php 以 fastcgi 模式工作的选项。所以此处采用后者,而以模块方式和 httpd 交互时采用前者。
-
"--with-config-file-path" 和 "--with-config-file-scan-dir" 分别是 php 配置文件 php.ini 的存放位置以及其他加载的配置文件路径,scan-dir 类的目录就像 /etc/profile.d、/etc/httpd/conf.d 这样的目录路径。
-
"--with-openssl" 选项让 php 支持 ssl;"--enable-mbstring" 选项是让 php 支持多字节字符的,例如中文一个字符两个字节,也就是说让 php 支持国际化的;"--with-zlib"、"--with-bz2"、"--with-mhash" 和 "--with-mcrypt" 选项让 php 支持这些压缩和加密机制。
-
"--with-freetype-dir"、"--with-jpeg-dir" 和 "--with-png-dir" 分别是让 php 支持多种文字样式、支持 jpeg、支持 png 的选项。
-
php 连接 mysql 有两种方式,一种是以 libmysql 的驱动方式连接 mysql,一种是以 mysqlnd 驱动方式连接 mysql。以下列出了 libmysql 和 mysqlnd 这两种驱动方式的编译模式。
-
以 libmysql 驱动方式连接 mysql(Mariadb),需要提前安装 mysql(Mariadb) 和 mysql-devel(mariadb-devel),并使用 "--with-mysql" 选项指定 mysql 安装路径,"--with-mysqli" 选项指定 mysql_config 脚本的路径,"--with-pdo-mysql" 选项也指定 mysql 安装路径。假如 mysql 安装在 /usr/local/mysql 下。
./configure --prefix=/usr/local/php \ --with-mysql=/usr/local/mysql \ --with-mysqli=/usr/local/mysql/bin/mysql_config -
以 mysqlnd 驱动方式连接 mysql,不需要提前安装 mysql 和 mysql-devel,--with-mysql、--with-mysqli 和 --with-pdo-mysql 选项都不需要指定具体路径,只需使用 mysqlnd 作为这些选项的值即可。
./configure --prefix=/usr/local/php \
--with-mysql=mysqlnd \
--with-mysqli=mysqlnd \
--with-pdo-mysql=mysqlnd
在 php 5.3 的时候已经支持 mysqlnd 驱动方式了,在 php 5.4 的时候 mysqlnd 已经是默认的配置选项了。建议使用 mysqlnd 的驱动方式。
-
6.9.2.2、php 编译过程
由于是配置 fastcgi 的模式,所以在 ./configure 的时候将 apxs2 功能换为 "--enable-fpm",并且由于此模式下的 php 由自己独立的服务来控制进程的生成,所以对于为了支持 httpd 线程的选项 "--enable-maintainer-zts" 也去掉。以下是编译安装过程:
[root@aarch64 ~]# yum install -y bzip2-devel libmcrypt-devel openssl-devel libxml2-devel libsqlite3x-devel oniguruma-devel
[root@aarch64 ~]# tar xf php-5.5.38.tar.bz2
[root@aarch64 ~]# cd php-5.5.38/
[root@aarch64 php-5.5.38]# ./configure --prefix=/usr/local/php --with-openssl --enable-mbstring --enable-sockets --with-freetype-dir --with-jpeg-dir --with-png-dir --with-libxml-dir=/usr --enable-xml --with-zlib --with-mcrypt --with-bz2 --with-mhash --with-config-file-path=/etc --with-config-file-scan-dir=/etc/php.d --with-mysql=mysqlnd --with-mysqli=mysqlnd --with-pdo-mysql=mysqlnd --enable-fpm
[root@aarch64 php-5.5.38]# make && make install
# 提供php配置文件
[root@aarch64 php-5.5.38]# cp php.ini-production /etc/php.ini
# 提供php-fpm服务管理脚本
[root@aarch64 php-5.5.38]# cp sapi/fpm/init.d.php-fpm /etc/init.d/php-fpmd
[root@aarch64 php-5.5.38]# chmod +x /etc/init.d/php-fpmd
# 提供php-fpm配置文件
[root@aarch64 php-5.5.38]# cd /usr/local/php/
[root@aarch64 php]# cp etc/php-fpm.conf.default etc/php-fpm.conf
# 修改php-fpm配置文件(做实验的话改不改随意)
[root@aarch64 php]# vim etc/php-fpm.conf
pm.max_children = 50
pm.start_servers = 5
pm.min_spare_servers = 2
pm.max_spare_servers = 8
# 启动php-fpm
[root@aarch64 ~]# service php-fpmd start
Starting php-fpm done6.9.2.3、配置 httpd 使其转发动态请求给 php-fpm
# 启用fcgi的支持模块。
LoadModule proxy_module modules/mod_proxy.so
LoadModule proxy_fcgi_module modules/mod_proxy_fcgi.so

# 添加php后缀格式文件的识别功能。
<IfModule mime_module>
    TypesConfig /etc/apache/mime.types
    AddType application/x-compress .Z
    AddType application/x-gzip .gz .tgz
    AddType application/x-httpd-php .php            # 新增
    AddType application/x-httpd-php-source .phps    # 新增
</IfModule>

# 添加php后缀的主页
<IfModule dir_module>
    DirectoryIndex index.php index.html
</IfModule>

# 启用虚拟主机模块,Include虚拟主机配置文件,并注释中心主机DocumentRoot。
Include /etc/apache/extra/httpd-vhosts.conf
#DocumentRoot "/usr/local/apache/htdocs"

# 配置虚拟主机。注意主机中需要添加下面两行,第一行表示关闭正向代理功能,第二行表示反向代理时进行正则匹配。
# 对主机的.php(不区分大小写)文件的访问都通过fcgi协议交给php,由于此处测试,php正好和httpd在同一服务器上,# 且php-fpm默认监听的端口为9000,所以为fcgi://127.0.0.1:9000,在此之后还需要写上/DocumentRoot/$1,
# "$1"是正则的反向引用
[root@arm64v8 ~]# grep -Ev "^#|^$" /etc/apache/extra/httpd-vhosts.conf
<VirtualHost *:80>
    ServerName www.a.com
    DocumentRoot "/var/www/a.com"
    ErrorLog "logs/dummy-host.example.com-error_log"
    CustomLog "logs/dummy-host.example.com-access_log" common
    ProxyRequests off
    ProxyPassMatch "(?i)^/(.*\.php)$" fcgi://127.0.0.1:9000/var/www/a.com/$1
    <Directory "/var/www/a.com">
            AllowOverride None
            Options None
            Require all granted
    </Directory>
</VirtualHost>
[root@arm64v8 ~]#
提供主页测试文件 index.php。
[root@aarch64 ~]# mkdir -p /var/www/a.com
[root@aarch64 ~]# vim /var/www/a.com/index.php
<h1>a.com</h1>
<?php
    phpinfo();
?>
重启 httpd,浏览器中进行站点访问测试,已测试成功。
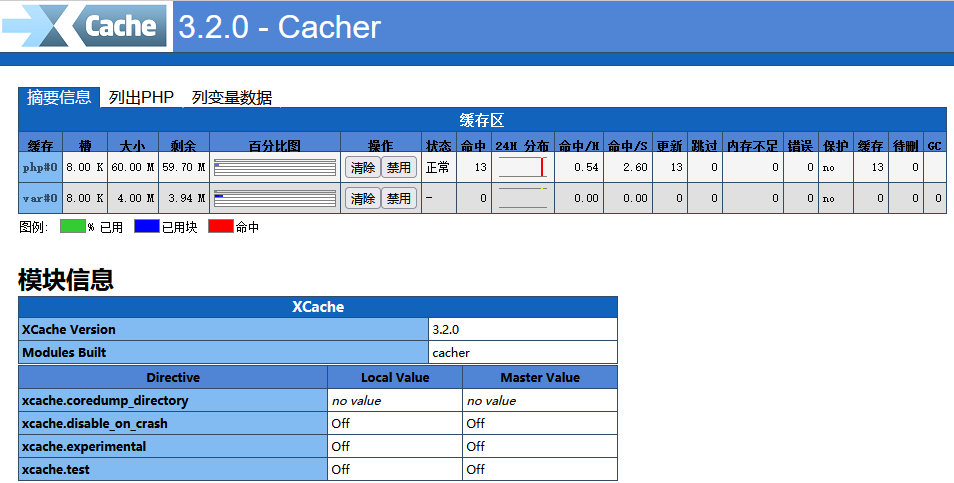
6.9.3、为 php 安装 xcache
php 是一种解释型语言,意味着 php 脚本在执行时不需要事先编译,而是像 shell 脚本一样直接执行。但事实上它还是会编译的,只不过是执行时编译,它会将代码编译成字节码(opcode)然后运行。
编译是一个很消耗时间的操作,因此需要为编译好的 opcode 提供缓存以提高性能,降低负载。目前最流行的 opcode 缓存工具是 XCache,它是一个开源的工具。
安装 xcache。
[root@aarch64 ~]# tar xf xcache-3.2.0.tar.gz
[root@aarch64 ~]# cd xcache-3.2.0/

# 添加扩展前,先运行phpize
[root@aarch64 xcache-3.2.0]# /usr/local/php/bin/phpize
Configuring for:
PHP Api Version:         20121113
Zend Module Api No:      20121212
Zend Extension Api No:   220121212
[root@aarch64 xcache-3.2.0]# ./configure --enable-xcache --with-php-config=/usr/local/php/bin/php-config
[root@aarch64 xcache-3.2.0]# make && make install
在解压 xcache 的目录下,有 xcache 的配置文件 xcache.ini,将其追加到 php 的配置文件中,或者将其复制到 php 的配置文件扫描目录 /etc/php.d 下(该目录是之前编译 php 时 ./configure 配置选项 "--with-config-file-scan-dir" 指定的项)。
[root@aarch64 xcache-3.2.0]# mkdir /etc/php.d
[root@aarch64 xcache-3.2.0]# cp xcache.ini /etc/php.d
将 xcache 源码目录下的 htdocs 目录拷贝到虚拟主机的根目录下
[root@arm64v8 xcache-3.2.0]# cp -a htdocs/ /var/www/a.com/关闭 xcache 认证,然后重启 php-fpmd 服务,重启 httpd 服务。
[root@arm64v8 ~]# vim /etc/php.d/xcache.ini
[xcache.admin]
xcache.admin.enable_auth = Off
[root@arm64v8 ~]# service php-fpmd restart
Gracefully shutting down php-fpm . done
Starting php-fpm  done
[root@arm64v8 ~]# service httpd restart
Restarting httpd (via systemctl):                          [  OK  ]
[root@arm64v8 ~]#
浏览器中输入 http://192.168.0.88/htdocs 可以看到 xcache 界面:
6.9.4、安装 MySQL(MariaDB)
在 x86 架构下,安装 mysql/mariadb 有三个选择,第一种是通过源码编译安装,第二种是通过通用二进制方式安装,第三种是通过 Linux 发行版包管理器安装。
在 arm64 架构下,安装 mysql/mariadb 要么自己通过源码编译,要么通过 Linux 发行版包管理器安装。这里的实验我们选择使用后者,即 rpm 包进行安装。
[root@arm64v8 ~]# cat /etc/yum.repos.d/mariadb.repo
# MariaDB 10.3 CentOS repository list - created 2021-10-29 03:23 UTC
# https://mariadb.org/download/
[mariadb]
name = MariaDB
baseurl = https://ftp.ubuntu-tw.org/mirror/mariadb/yum/10.3/centos7-aarch64
gpgkey=https://ftp.ubuntu-tw.org/mirror/mariadb/yum/RPM-GPG-KEY-MariaDB
gpgcheck=1

[root@arm64v8 ~]#
[root@arm64v8 ~]# yum install MariaDB-server MariaDB-client -y
初始化 mariadb
[root@arm64v8 ~]# systemctl start mariadb.service
[root@arm64v8 ~]# mysql_secure_installation
# 按照步骤完成初始化
[root@arm64v8 ~]# mysql -uroot -p
Enter password:
Welcome to the MariaDB monitor.  Commands end with ; or \g.
Your MariaDB connection id is 17
Server version: 10.3.31-MariaDB MariaDB Server

Copyright (c) 2000, 2018, Oracle, MariaDB Corporation Ab and others.

Type 'help;' or '\h' for help. Type '\c' to clear the current input statement.

MariaDB [(none)]>
6.9.5、测试 LAMP——搭建 discuz 论坛
discuz 是论坛软件系统,基于 php+MySQL 平台。基本配置很简单,更多的配置和个性化定制在官方主页查看教程。
官方主页:http://www.discuz.net/forum.php
discuz 下载地址:http://www.discuz.net/thread-3570835-1-1.html
简单布置它们的过程很简单,只需复制相关文件到对应的网站根目录下,然后在浏览器中输入对应的目录名即可打开程序。中间测试过程中如果出现问题,再对应修改即可。
首先配置 httpd,提供一个虚拟主机。
[root@arm64v8 ~]# grep -vE "^#|^$" /etc/apache/extra/httpd-vhosts.conf
<VirtualHost *:80>
    ServerName www.a.com
    DocumentRoot "/var/www/a.com"
    ErrorLog "logs/dummy-host.example.com-error_log"
    CustomLog "logs/dummy-host.example.com-access_log" common
    ProxyRequests off
    ProxyPassMatch "(?i)^/(.*\.php)$" fcgi://127.0.0.1:9000/var/www/a.com/$1
    <Directory "/var/www/a.com">
            AllowOverride None
            Options None
            Require all granted
    </Directory>
</VirtualHost>
[root@arm64v8 ~]#
将解压后 discuz 中的 upload 目录复制到对应虚拟主机的 DocumentRoot 目录下。
[root@arm64v8 ~]# unzip -q Discuz_X3.2_SC_UTF8.zip
[root@arm64v8 ~]# cp -a upload/ /var/www/a.com/
重启 httpd 服务。测试 discuz。不过得先在客户端的 hosts 文件中添加解析记录,例如此处为:
10.47.76.25 www.a.com[root@arm64v8 ~]# service php-fpmd restart
Gracefully shutting down php-fpm . done
Starting php-fpm done
[root@arm64v8 ~]# service httpd restart
Restarting httpd (via systemctl): [ OK ]
[root@arm64v8 ~]#在浏览器中输入 http://www.a.com/upload:

然后在安装前会自动检查是否符合安装条件。将以下所有不符合条件的全部修改成符合条件:

[root@arm64v8 ~]# cd /var/www/a.com/upload
[root@arm64v8 upload]# touch config/config_{global,ucenter}.php
[root@arm64v8 upload]# chmod a+w config/config_{global,ucenter}.php
[root@arm64v8 upload]# chmod a+w  data config data/{cache,avatar,plugindata,download,addonmd5,template,threadcache,attachment,log} data/attachment/{album,forum,group}
[root@arm64v8 upload]# chmod a+w uc_client/data/cache
[root@arm64v8 upload]# chmod a+w uc_server/data uc_server/data/{cache,avatar,backup,logs,tmp,view}
[root@arm64v8 upload]#
刷新下,条件满足:

继续下一步,配置数据库和管理员信息,按照提示很容易配置:
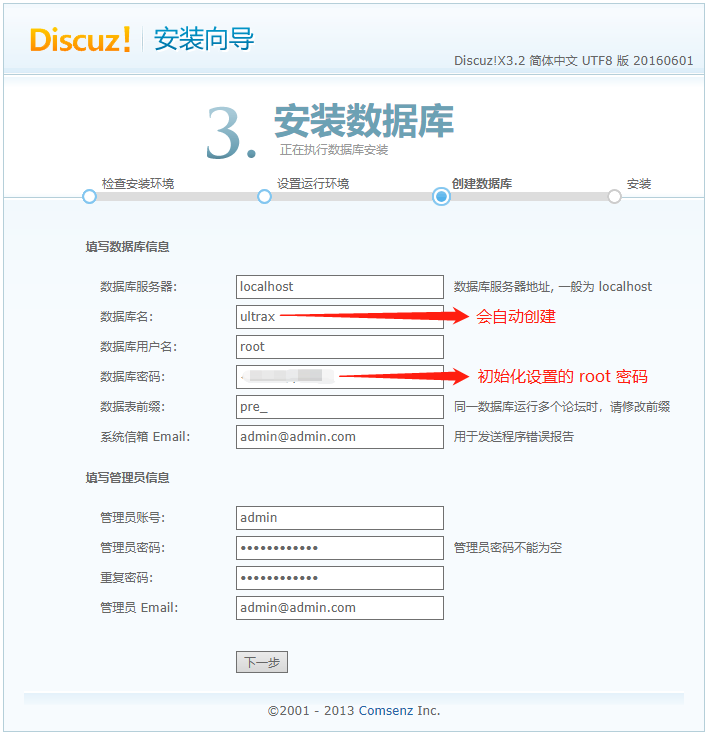
点击下一步继续,出现如下问题:
数据库连接错误
No such file or directory

您必须解决以上问题,安装才可以继续- 解决方法:将 localhost 改成 mysql 服务器的 IP 地址即可。
继续下一步安装完成:
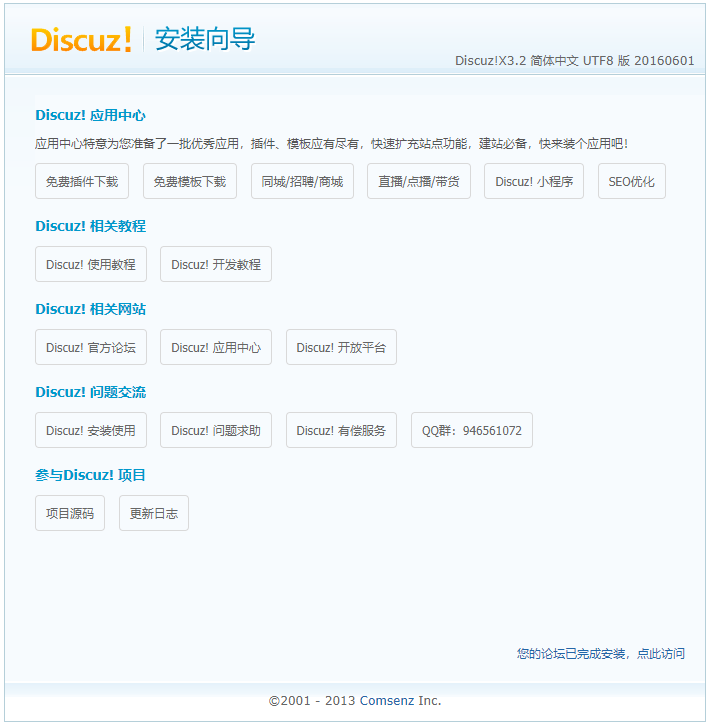
至此,Discuz 论坛已经完成安装,LAMP 测试结束。